
A920: Board SwipeSimple
Last Updated:What's in this article?
If the SwipeSimple app will be used on a Pax terminal:
Boomtown will complete the boarding in the SwipeSimple portal, but there are three additional steps to complete in the Pax store:
- Create Merchant’s profile, complete with the terminal added to it
- Push the processor-specific BroadPOS payment application
- Push the SwipeSimple application
To complete these steps, you must have the serial number of the Pax terminal.
- Once you’re logged in, simply click the Grid to get to the Administration Center:
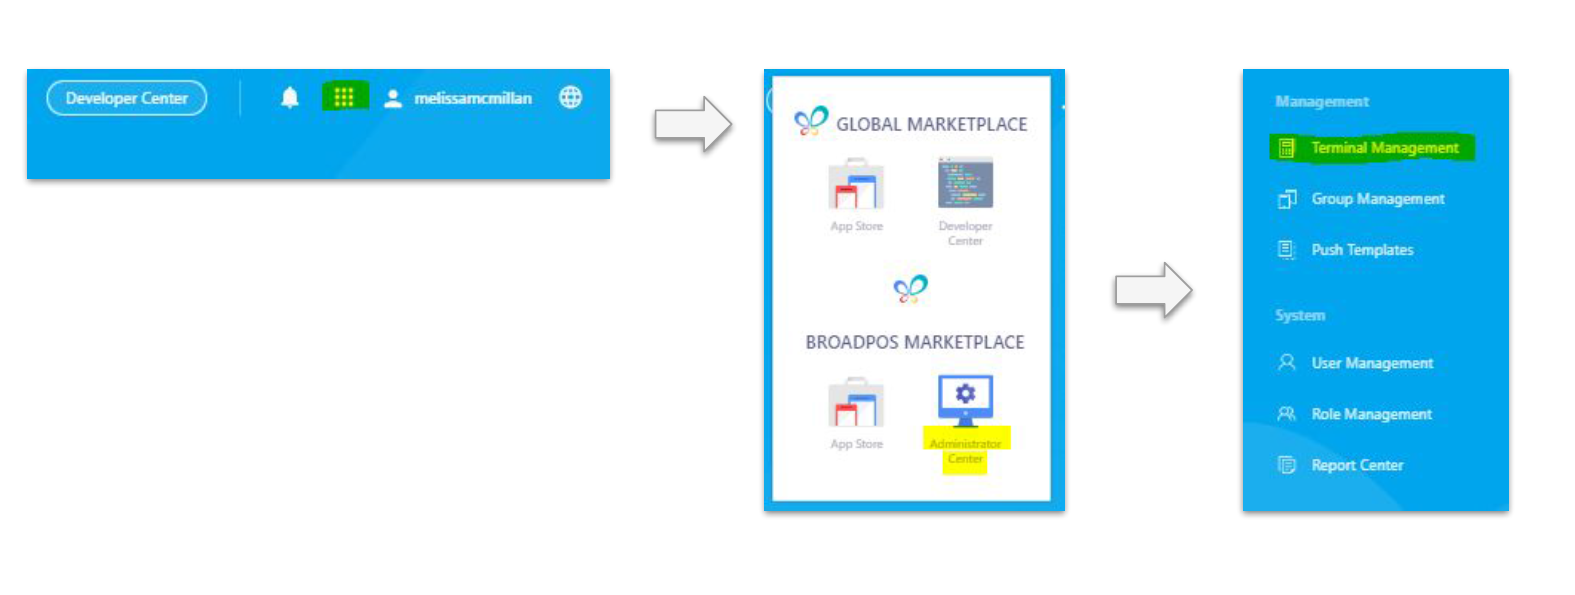
- Next, under the Management Side Menu, select “Terminal Management” on the column menu.
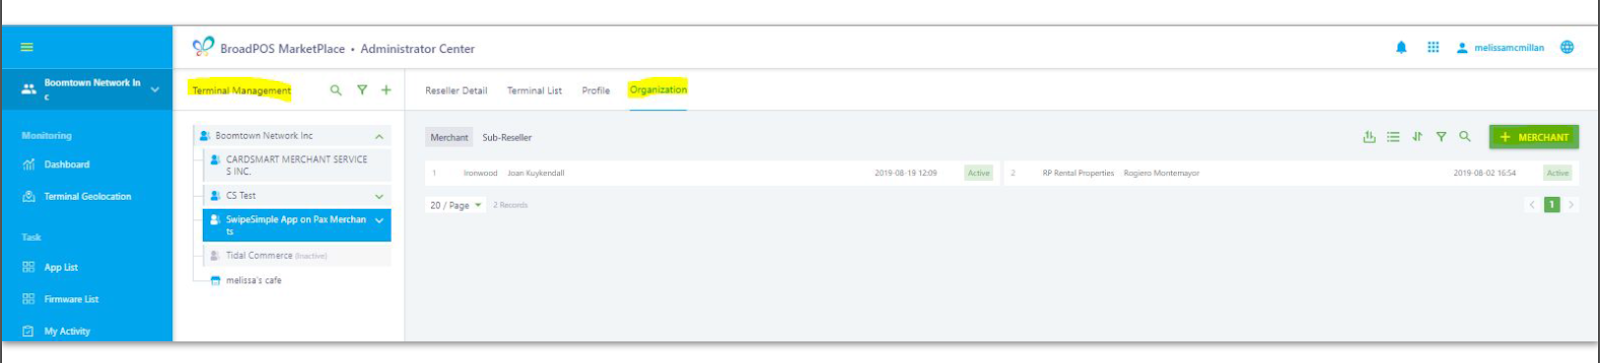
- Under the Organization Tab (at the top of the screen) click to view a list of all Merchants linked to your reseller account. To add a merchant, select the “+ Merchant” Icon on the right of the Screen:
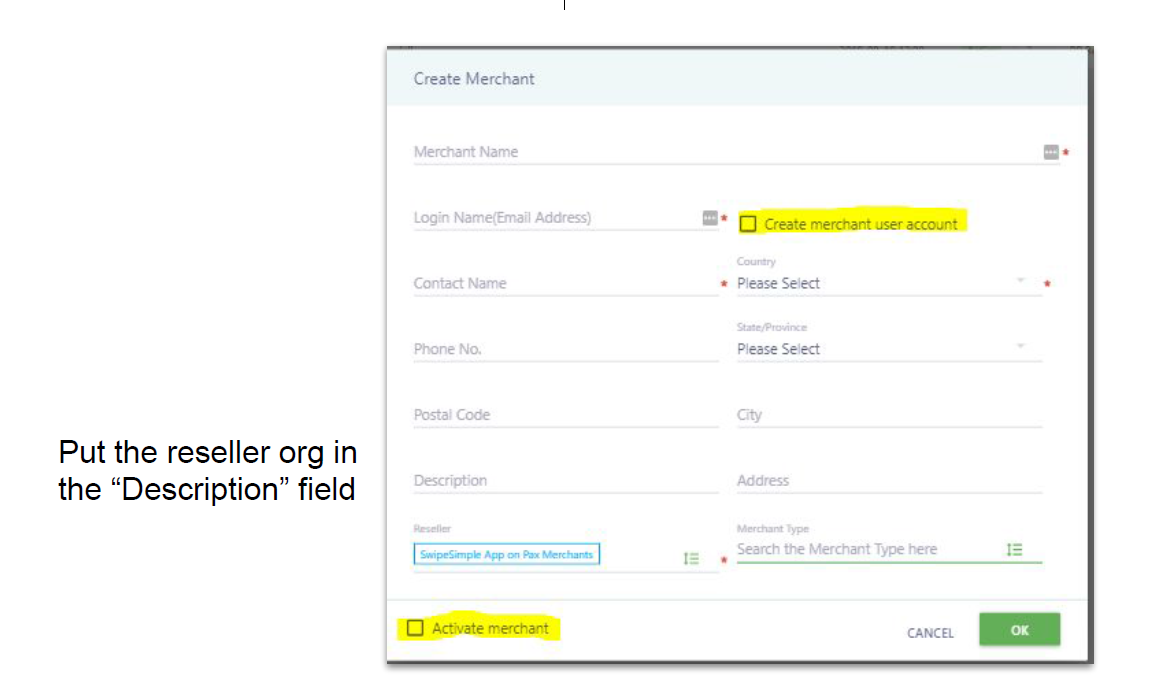
- A new “Create Merchant” page appears with Merchant details to be completed. Paste the necessary info over, then select the “Activate Merchant” Checkbox and select “OK” after filling in Merchant details. Be sure to select the cloud icon beside the Merchant name to activate the Merchant account.
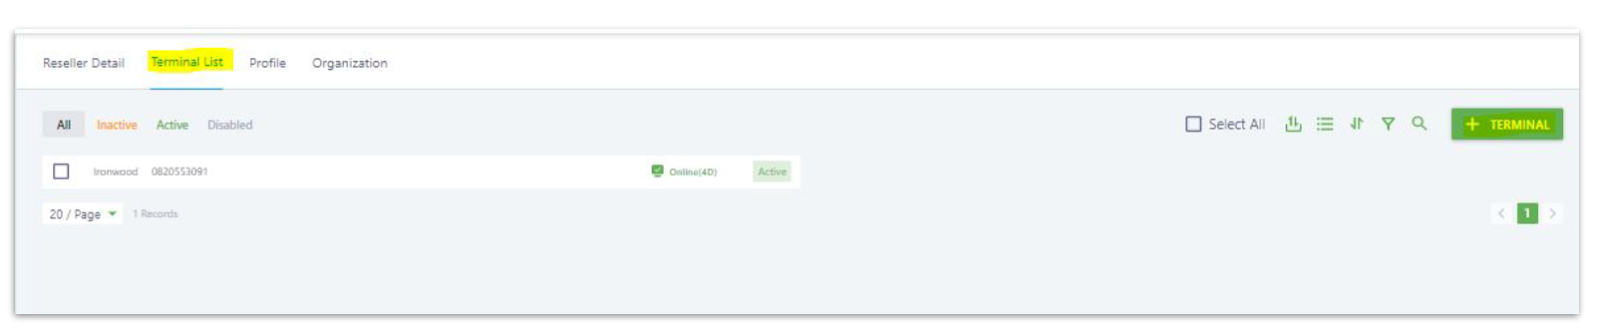
- Once activated, select the “Terminal List” Tab corresponding to the merchant account.
- You will see the +Terminal icon now available on the right of the screen. Select the “+Terminal” icon. A new “create terminal page” appears with details to be filled Key details to be filled are:
- Terminal Name
- Serial Number
- Manufacturer (Select “PAX”) from dropdown
- Mode (Choose “PAX A920” from the drop down menu)
- location
- You will need to activate the newly created hardware terminal. Select the cloud icon beside the hardware terminal name to activate the hardware terminal.
Now to push the two apps we need to push:
- Select on the newly created hardware terminal entry within PAXSTORE
- Select the “App & Firmware” tab. You will see the “+Push application” button on the screen.
- Select the “+Push application” on the right of the screen to provision the processor-specific BroadPOS payment Application.
- Search for the payment application to be pushed to the hardware terminal…
- If the Merchant has a First Data Omaha processor account, search for “BroadPOS Omaha”
- If the Merchant has a TSYS Sierra processor account, search for “BroadPOS Sierra” (NOTE: use version v1.03.02E_20190621)
- If the Merchant has a Worldpay processor account, search for “BroadPOS Vantiv”
- Select the required payment application and select “OK”. The necessary payment application is added to the “Push Queue”. The push queue is right below the “+Push application” button in case you need to go back to it.
- A new screen appears with the title, “Edit parameters”.
- Select the parameter template to be used in the “Select Parameter Template” Box
- Enter and select the “Retail” template if the merchant does not require tipping functionality,
- “Restaurant” template if the merchant requires tipping (“Restaurant” should be selected even for retail merchants accepting tips). Tips can be configured for the merchant by accessing the account settings on swipesimple.com
- Search for the payment application to be pushed to the hardware terminal…
- Under “Edit Parameter”, select the “here” button to reset parameters after every provisioning.
- This will ensure that information from previous builds is cleared out.
- Next, under “Edit Parameter”, select the processor specific Merchant parameters tab. This tab will be titled differently in each of the BroadPOS payment applications:
- In a BroadPOS Omaha payment application, the tab is titled as “OMAHA”
- In a BroadPOS Sierra payment application, the tab is titled as “TSYS”
- In a BroadPOS Vantiv payment application, the tab is titled as “VANTIV”
- After entering parameter configuration, select 'Next" to save the details entered.
- The next screen has a “Push immediately” option, select it and then select “activate”.
- The BroadPOS payment application is now pushed onto the hardware terminal!
Note: Please review “Steps for configuring parameters for processor-specific payment applications” in the Appendix to The SwipeSimple Terminal Deployment Guide for specific details about how to configure parameters pertaining to each processor