
Quick Charge
Last Updated:What's in this article?
Quick Charge
Quick charge allows a user to do a quick transaction from the Vivid Lite terminal. This allows a user to sell the items that are not there in the catalog but you still wants to sell that item from the Vivid Lite terminal. Before a quick charge transaction, the user need to enable a configuration- Enable Quick Order on Vivid Lite from the backend portal and do the setup as mentioned below.
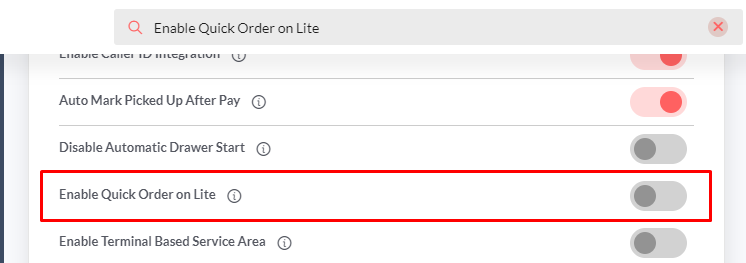
Go to the Configurations in the backend portal.
Search the configuration- Enable Quick Order on Lite and tap on it as shown in the screenshot above.
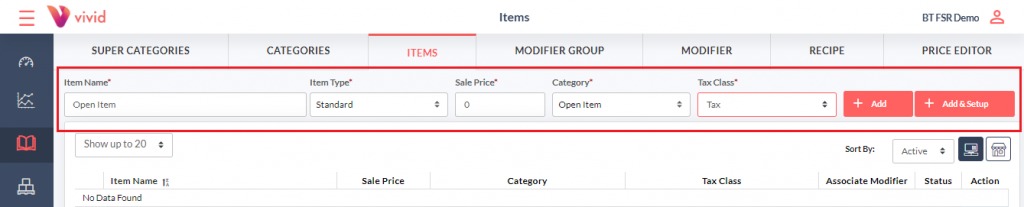
Now go to the Catalog, click Item and create a new Open Item.
Enter the item name, select category and fill in the other details before clicking the Add & Save button.
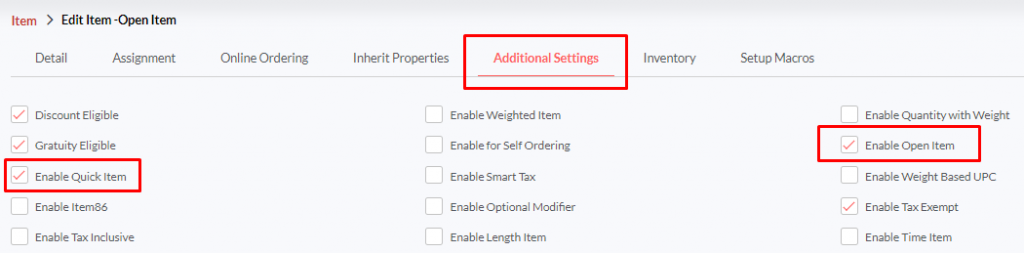
Go to the Additional Settings section and tap the checkboxes next to Open Item and Quick Item.
Click Save to save the changes.
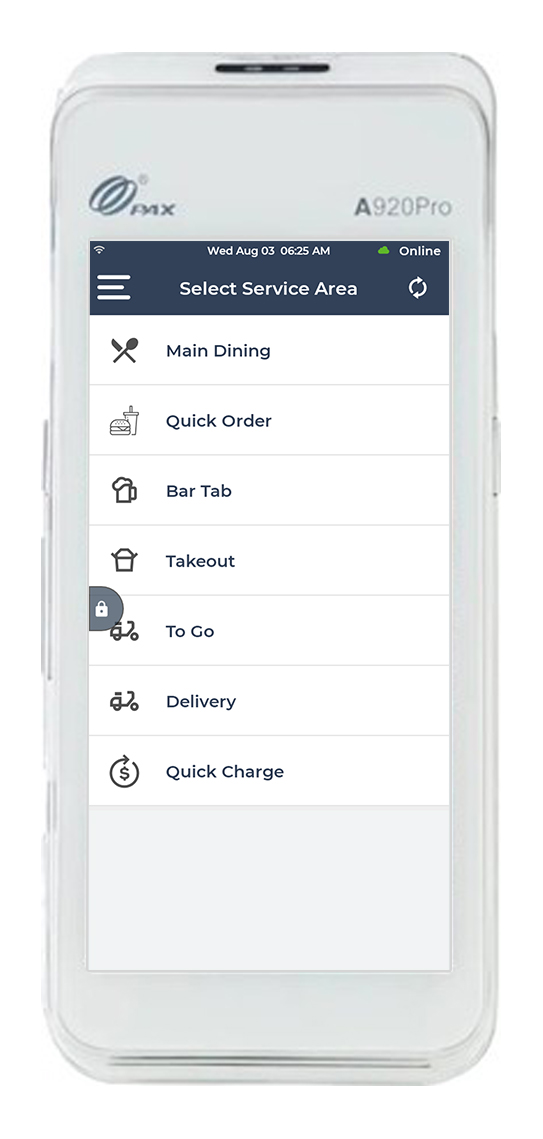
Once you log in to the Vivid Lite app, the service area list opens up.
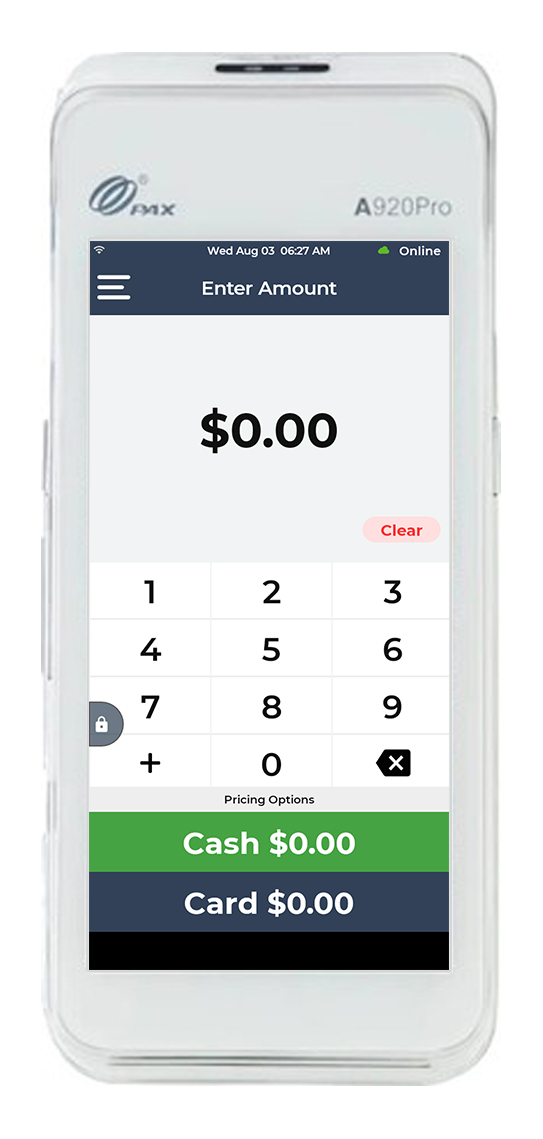
Click the Quick Charge button on the top.
On the Quick Charge screen, enter the amount you want to charge the customer.
Select the payment option at the bottom – Cash or Card.
You can also explore other payment options at the top of the screen (for example gift cards and EBT payments).
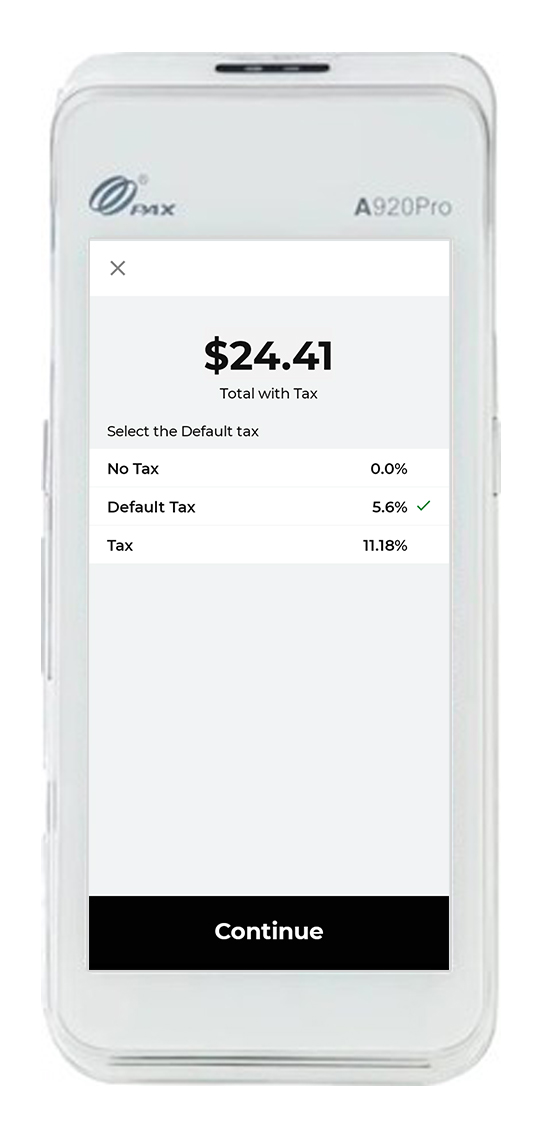
If you are choosing the credit option, you may be prompted to select the tax.
Click Continue to charge the amount.
If you only have 1 default tax rate or no taxes, you will skip this screen.
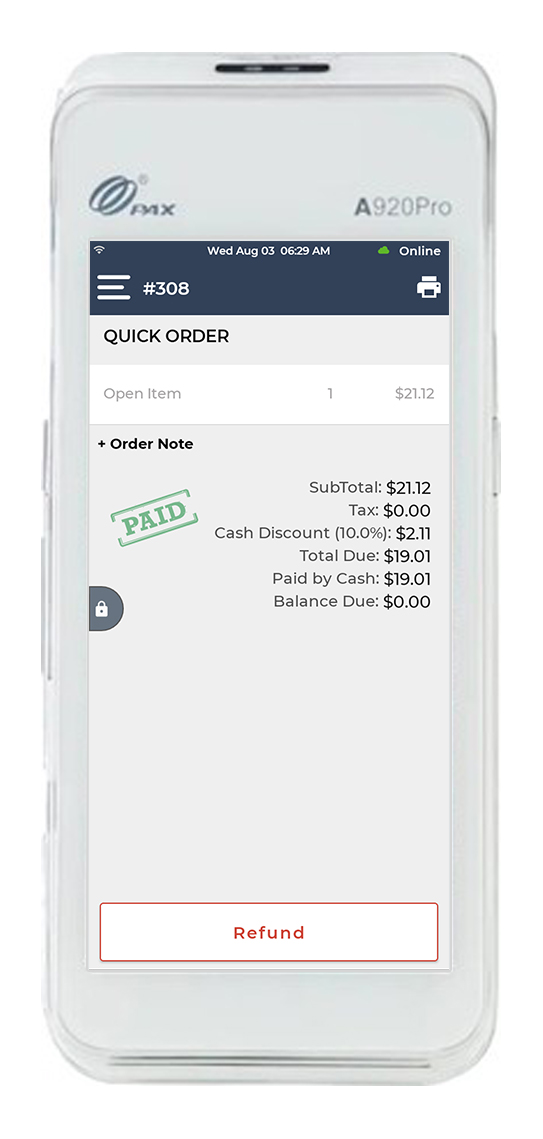
On successful transaction, the order details will be displayed on screen with Open Item as the item name.