
Starting a Table
Last Updated:What's in this article?
Starting a Table
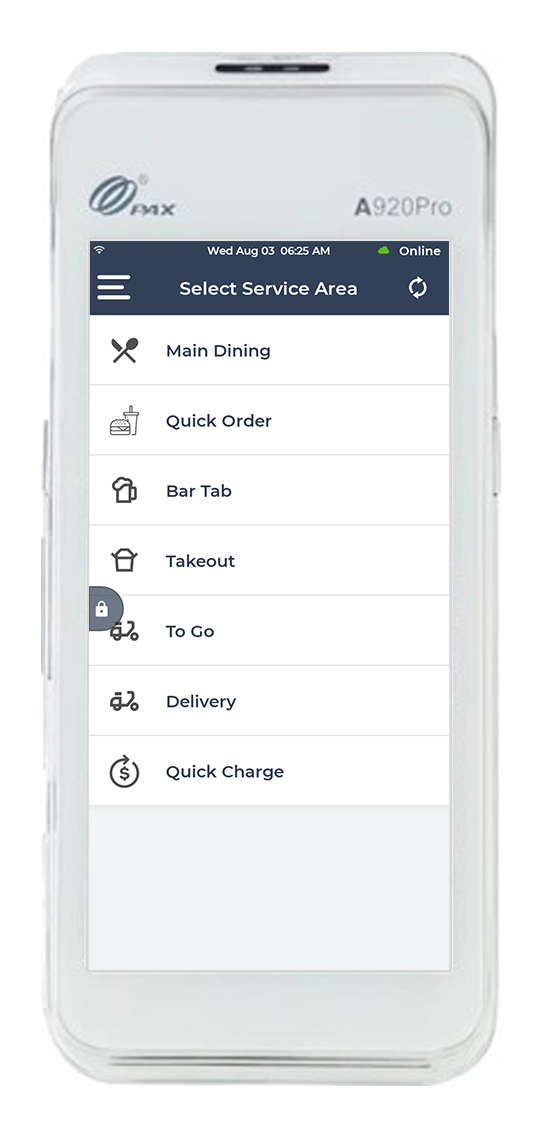
Go to the Service Area screen.
Click the Main Dining tab to start a table.
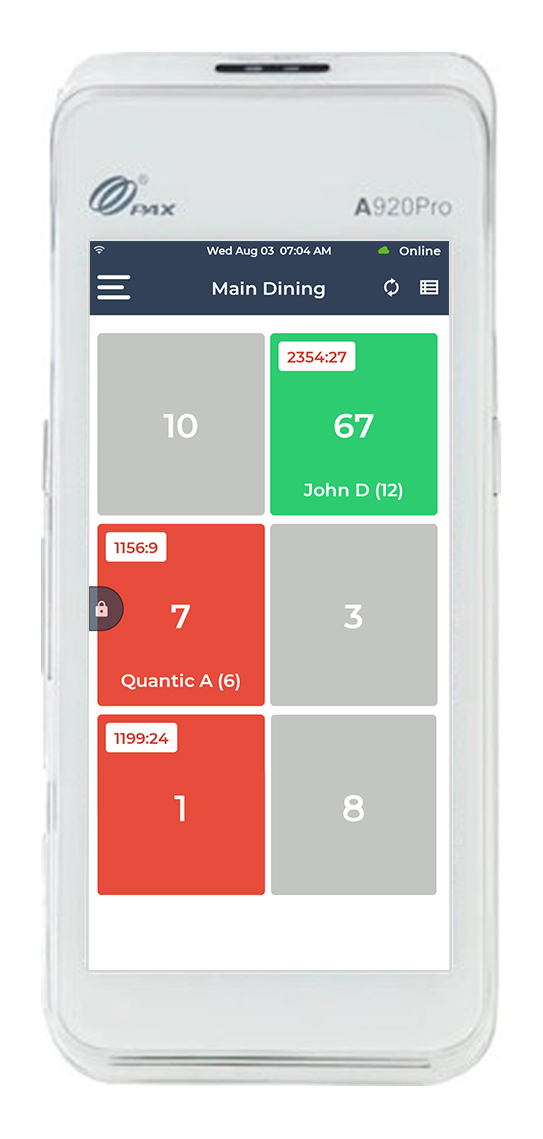
A list of tables will appear. The blocks will appear grey if the tables are empty, or red if occupied.
Tap the table where you want to start an order.

Enter the guest count.
Click Done.
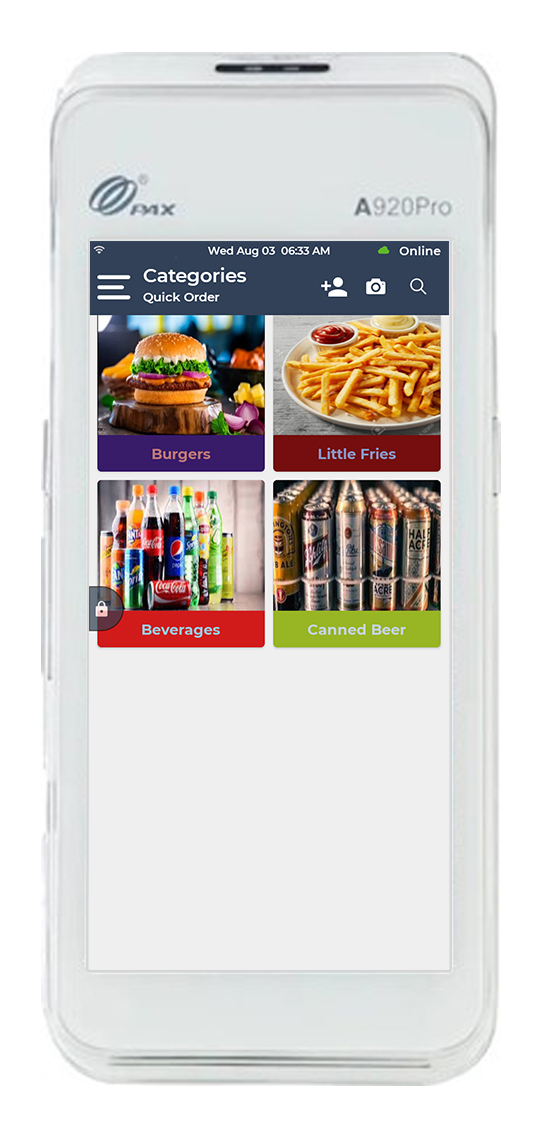
Tap the category you want to select an item from.
Note:To add a customer to a table, click ![]() on the top right corner. Select the customer from the pre-added list or you can add a new customer on the table as well.
on the top right corner. Select the customer from the pre-added list or you can add a new customer on the table as well.
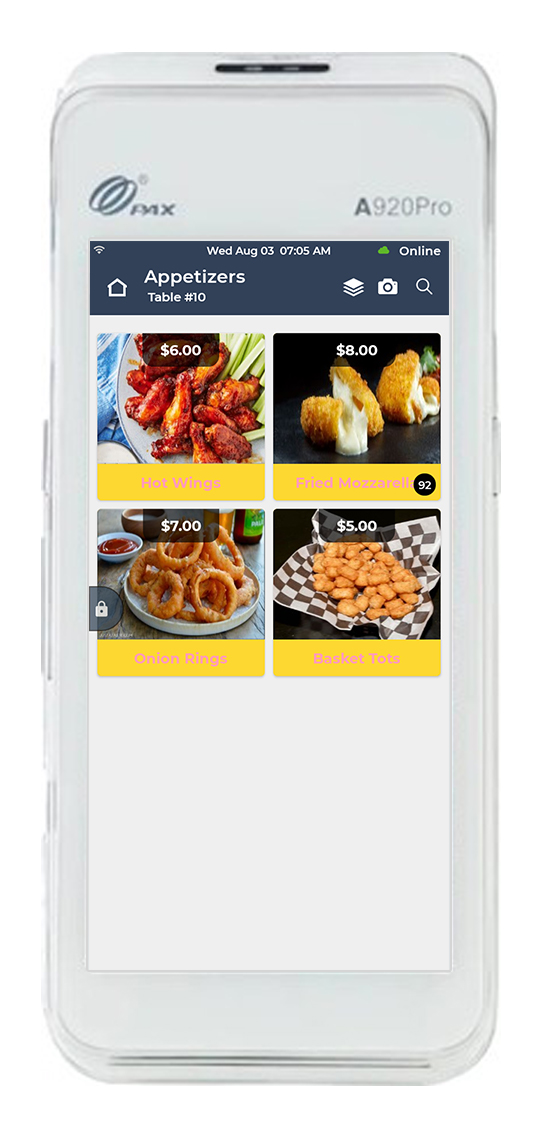
The item list will open with images and prices for each item.
Select the item(s) to be added to the cart.
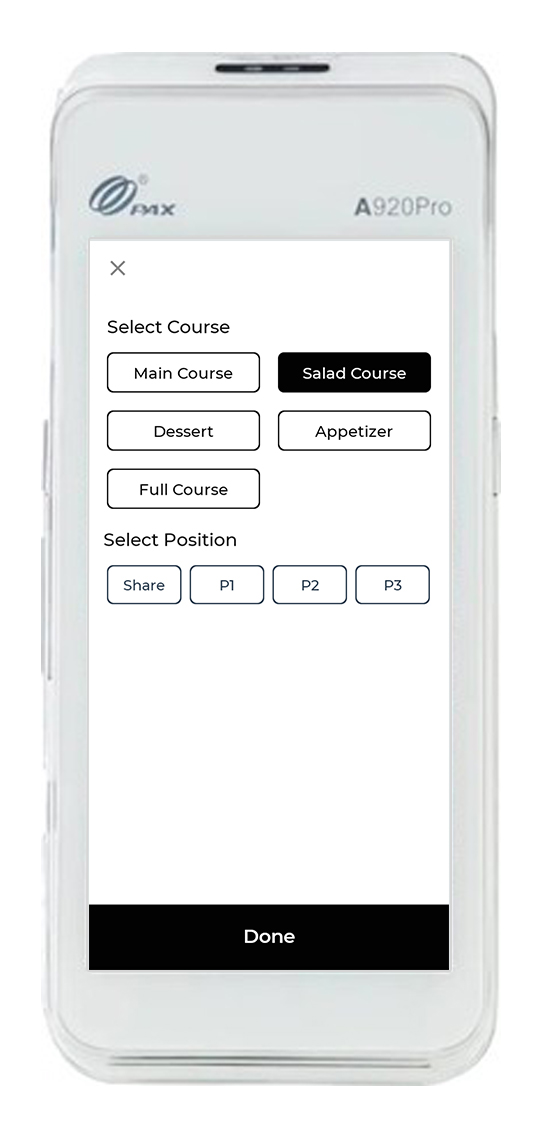
The Course and Position window appears. Here you can select the course for the selected item. Every time a new item is added to the cart, the course and position need to be selected.
Click Done.
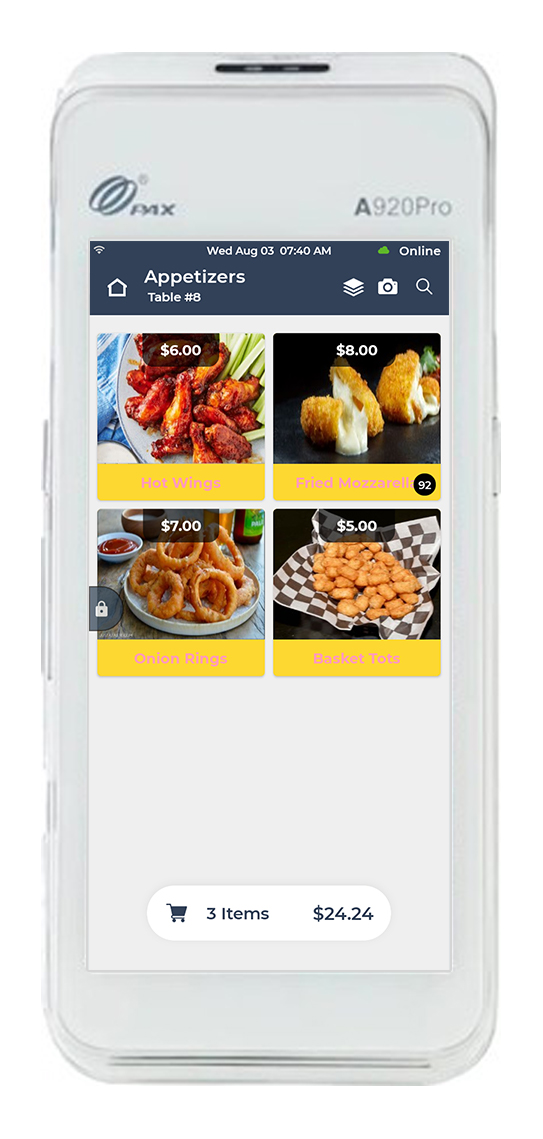
Once all the required items are added to the cart, click  at the bottom to checkout.
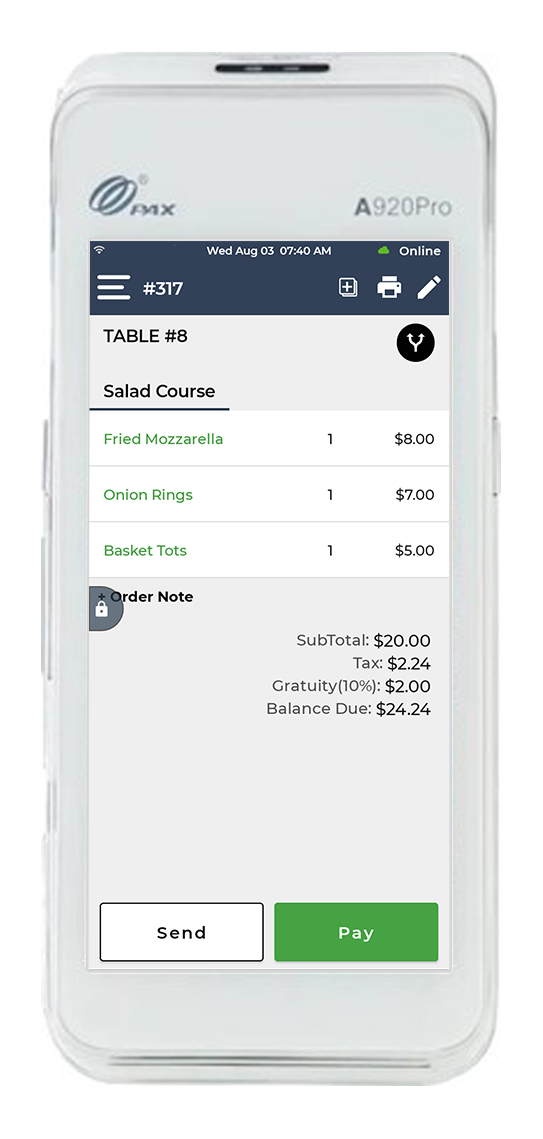
Verify the order at the checkout screen.
Click Pay at the bottom and select the payment option. You can also send the order to the kitchen by clicking Send.