Coursing and Positioning
Last Updated:What's in this article?
Coursing and Positioning
Vivid Lite allows the servers to assign seats and courses when building an order. Orders will be split into the respective positions when ordered. It begins with adding a course list in the backend portal and enabling the course for categories. If you have already added the course list and enabled the course for categories/items from the back-end portal, skip to the next section, Starting a Table.
Creating a Course List
Login to the Quantic back-end portal.
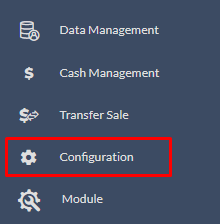
Click the Hamburger button and select Configuration on the left.
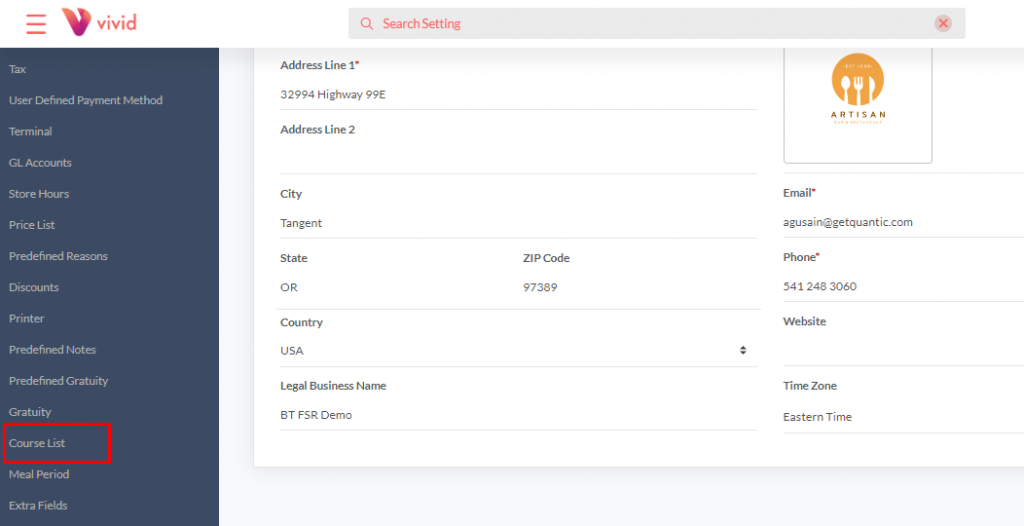
Expand the Setup menu and click Course List.
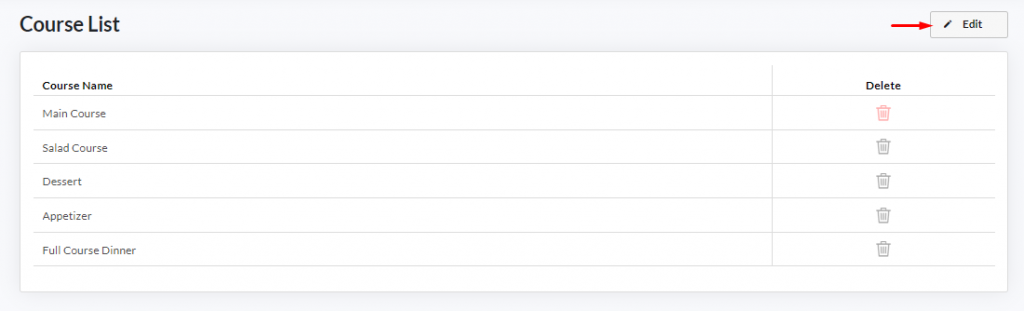
Click the Edit button on the top right corner.
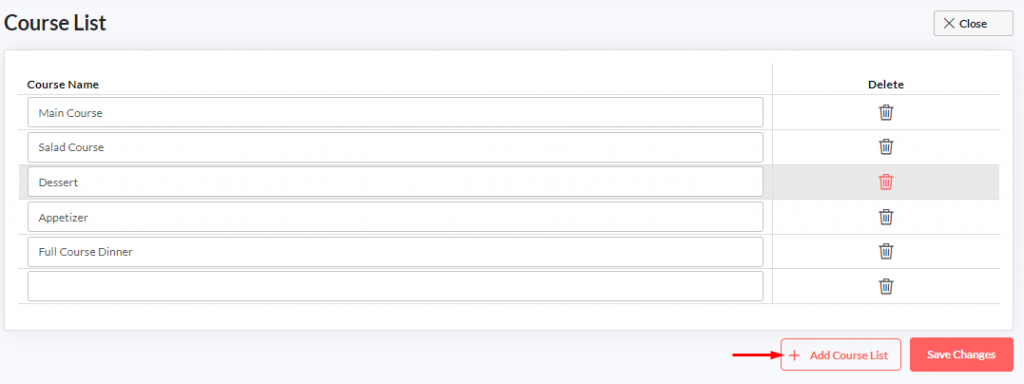
Click ➕Add Course List button.
A new row will be added underneath the Course Name. Click on the empty field, put the name of the course, and click Save Changes.
To add more, click ➕Add Course List button, enter the name of the course, and keep repeating this step until you are done.
Click the Back to Dashboard button on the top left corner.
Enabling Course
1. On category level
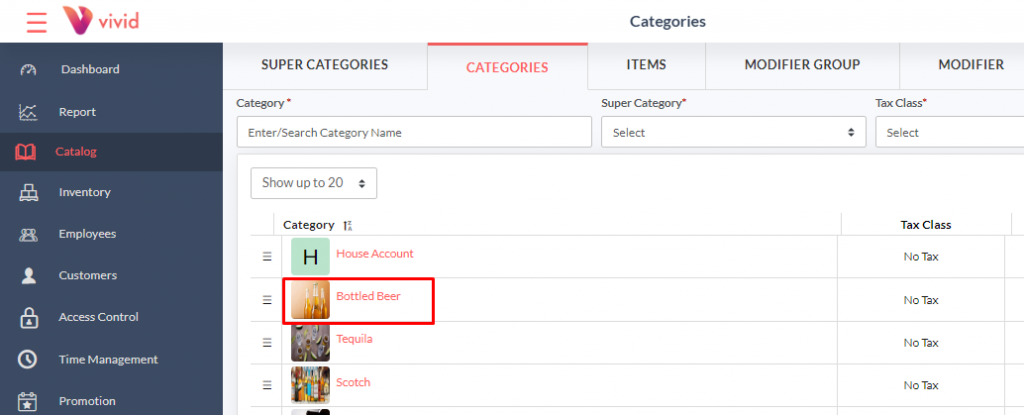
Click the Catalog button on the left menu.
Click the Categories tab.
Select the Category you want to enable the coursing for.
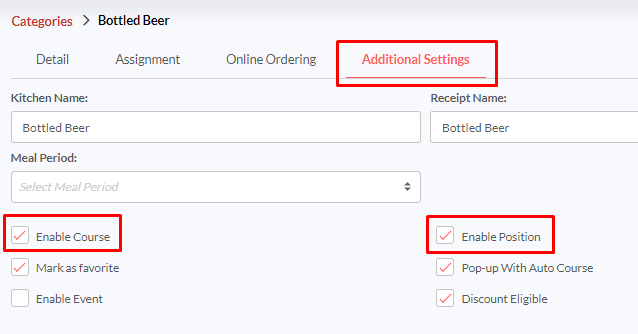
Click Additional Settings.
✔️ mark the Enable Course and Enable Position checkbox.
Click Save.
Now all items in this category will inherit the setting for course and position.
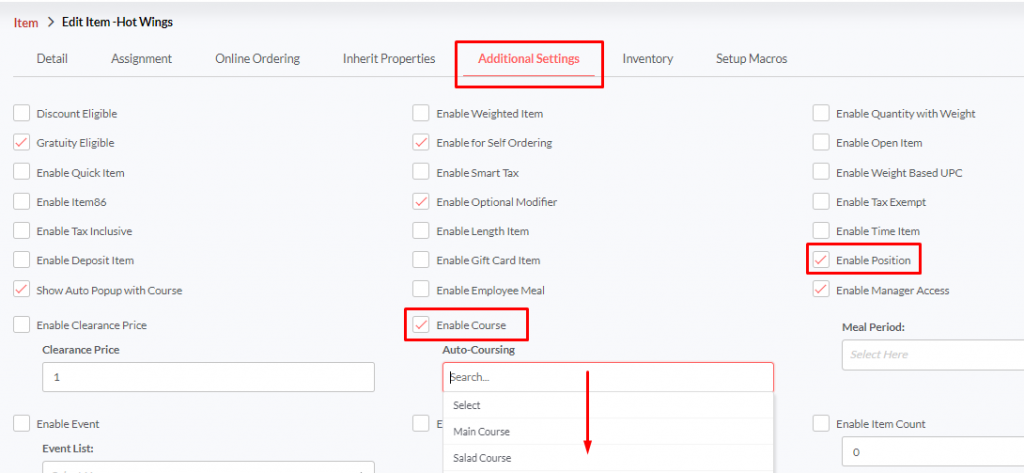
2. On item level
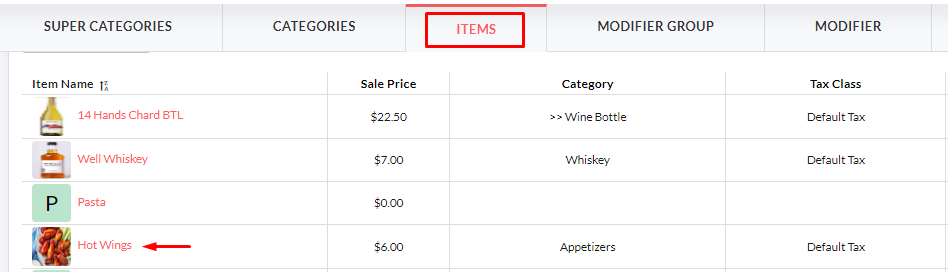
Click the Catalog button on the left menu.
Click the Item tab.
Select the Item you want to enable the coursing for.
Click Additional Settings.
✔️ mark the Enable Course (Auto-Coursing) checkbox or select the course from the drop-down list.
✔️ mark the Enable Position checkbox.
Click Save.